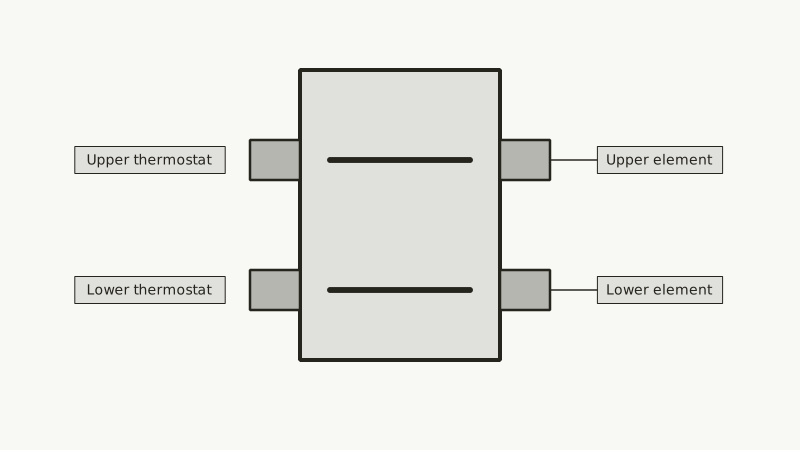
An electric water heater with a burned-out element gives you lukewarm water, hot water that runs out in minutes, or none at all. The part itself is inexpensive and the swap is a standard repair, but it means working near 240-volt wiring and emptying part of the tank, so it rewards care. Below is how to prove the element is bad, what to buy, and how the job goes. Gas models have no elements, and they are covered under water heater repair.
Is it really the element, or something else on the heater?
Start at the symptoms. Total loss of hot water usually points to power, a tripped reset or the upper element. Lukewarm water, or hot water that vanishes fast, suggests the lower element has failed. Confirm it with a multimeter: a working element reads roughly 5 to 25 ohms, with about 12.5 typical, and a reading of infinity means it is open.
A. O. Smith's troubleshooting chart gives the order. First check that 240 volts reaches the top screws of the upper thermostat. If the red reset button clicks when pressed, the high-temperature cutoff had tripped. If it does not click, check the upper element with the power off and the wires pulled. Then test each element to the metal tank: the meter should read OL, and a low reading means the element is shorted to ground and must be replaced. If both elements and both thermostats test fine, look for a leak on the hot side of the plumbing. The same sequence continues in when an electric tank runs cold.
Which part and tools should I have on hand before starting?
You need an element that matches the voltage and wattage printed on the heater's data plate, a gasket if it is not included, an element wrench or 1½-inch socket, a multimeter, a non-contact voltage tester and a garden hose. Match the screw-in style too: some heaters use a flange-mount element with bolts instead.
The data plate lists the voltage and watts for the upper and lower elements, and they are not always the same, so read it rather than guessing. A common 240-volt, 4500-watt element should measure about 12.8 ohms when healthy, which fits the 5 to 25 ohm window. A hardware or plumbing supplier can match the part from the model number. Buy the exact fit; a different wattage changes heating behavior and may not suit the thermostat. Lay out a towel, a bucket and a flashlight before you shut anything off.
How is the element replaced, step by step?
Open the double-pole breaker, test the wires for voltage, shut the cold feed, lower the tank water to a level under the element, unscrew the old one, seat the new one on its gasket, refill to the brim and only then bring the power back. The sequence matters most at the end: a heating element powered while dry burns out within moments.
- Flip the heater's breaker to off in the panel, then hold a non-contact tester to the wires behind the access cover to be sure.
- Remove the access cover and fold back the insulation, then take the wires off the element screws and note where each went.
- Close the cold supply valve, feed a hose from the drain valve out to the yard, and crack open a hot tap upstairs so air can get in. Let it empty until the level falls below the element. For the upper element, dropping below the upper thermostat is sufficient according to the guides; for the lower one, go well beneath it or empty the tank.
- Unscrew the old element counterclockwise with the wrench. Clean the opening and check the tank wall for heavy scale or rust.
- Thread the new element in with its gasket, snug it up, then reattach the wires where they came from.
- Close the drain, open the cold supply, and leave the hot tap running until water flows steadily with no air sputtering. A. O. Smith says to let hot water run about three minutes to purge air, which it calls very important for electric heaters.
- Check for drips at the element, replace the insulation and cover, then switch the breaker on.
Wait a bit before judging results; a full tank takes time to reheat. Set the thermostat to 120 degrees Fahrenheit, which the Department of Energy calls a temperature considered safe for most of the population.
Where does a plumber take over from the homeowner?
Bring one in when household wiring makes you uneasy, when the element will not turn, if the access panel shows burned or melted wiring, if a thermostat tests bad as well, or if the tank leaks. A leaking tank means the heater needs replacing, not another element. Anything involving the gas side or the heater's connections has its own rules.
Long Beach adds a permit angle. The city's plumbing page says a permit applies when water heating equipment is installed, altered, repaired or replaced, though repair that does not involve disconnecting the unit is exempt. An element swap normally leaves the unit connected, but check the current rule with Building and Safety if you are unsure. Anything beyond that, such as a replaced heater, needs a permit and earthquake strapping. A local plumber can be requested through the quote page, with a price on paper first, while the Harbor Lights home page covers our other services. Thumbtack's October 2026 guide puts a thermostat or element repair at about $150 to $200 nationally.
Why do elements burn out, and can I make the next one last?
Mineral scale is the main enemy. Hard water coats the element, which then runs hotter than it should and fails sooner. Long Beach Utilities reports hardness averaging about 76 ppm in one zone and 220 ppm in another, so houses in the harder zone have more to worry about. Regular flushing and anode checks slow the damage.
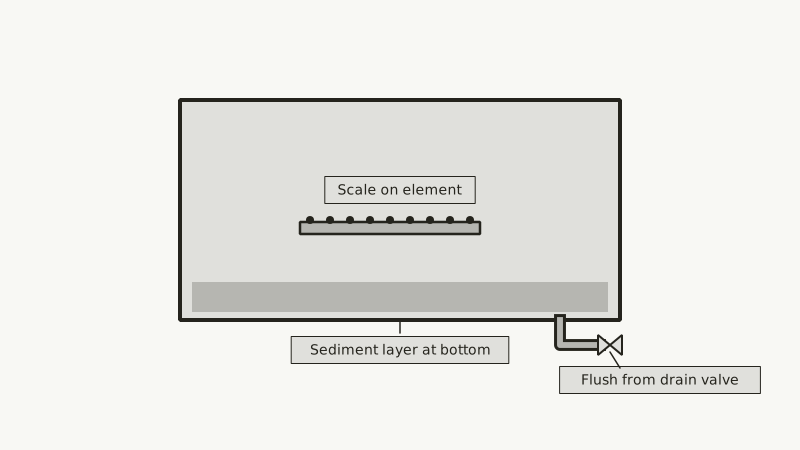
A. O. Smith advises checking the anode rod at least every three years, depending on local water, and every year if a softener is in use. Every so often, draw a few gallons off the drain valve until the stream clears; milky water means draining the whole tank. Never run an electric heater with an empty tank, and keep the temperature at a sensible setting. When the heater is nearing the DOE's 10 to 15 year range for storage models, the replacement interval for water heaters helps you decide whether to keep spending on it. Anode work has its own write-up, changing the anode rod, and figures for a whole new heater are in water heater replacement pricing.
Common questions
How big a time commitment is this repair?
Expect one to two hours of hands-on work, with the draining, refilling and reheating extra. A seized element, heavy scale or a second bad part stretches it. Do not rush the refill, because skipping the air purge is the mistake most likely to damage a new element.
Is it smarter to change the top and bottom elements together?
Not necessarily, but it is a sensible idea when both are old and you already have the tank drained, since they are the same age. If one failed and the other tests in range, you can swap only the bad one. Pull the data plate numbers for each element, since upper and lower parts can differ.
Do I have to empty the tank just to test an element?
No. A test requires dead power and the wires lifted off the element, yet the tank can stay full; draining is only for pulling and replacing the part. Anywhere from 5 to 25 ohms on the multimeter means the element is intact. Prove the circuit is dead before touching a wire.
Does a bad element raise my electric bill?
A failed element heats less, not more, but a shorted or stuck-on one or a faulty thermostat can waste energy, and the repair is cheap compared with the loss. If you see an odd jump, a broken water heater and your electric bill walks through the causes.
References
Updated